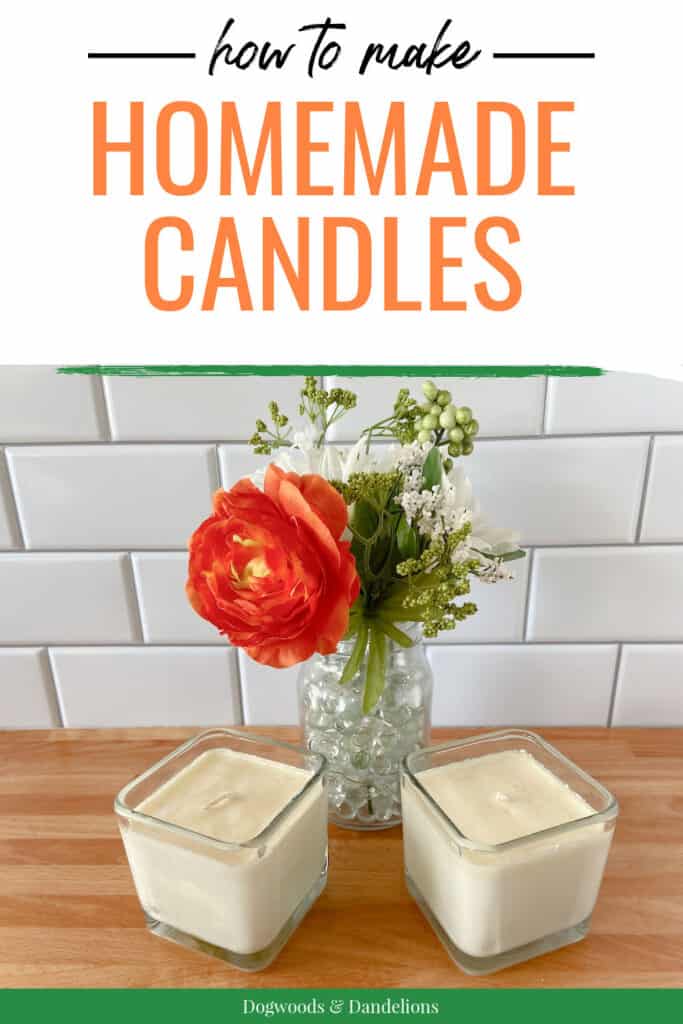
How to Make Homemade Candles
Homemade candles are fun to make and give as gifts. This tutorial will show you how easy it is to make homemade candles using essential oils.
I love giving homemade gifts. I tend to make homemade gifts for the majority of the adults in my life. It (usually) saves money and is always something a little unique. One of my favorite DIY gifts to give in the past has been candles.
Homemade candles make a great gift for almost anyone. For any season. You can make candles scented with essential oils for end-of-the-year teacher gifts, hostess gifts, birthdays, Christmas, and just for fun.

Affiliate Disclosure: Please note that some of the links in this article may be affiliate links and I may receive a small commission if you purchase something through a link. It will not change your cost. As an Amazon Associate, I earn from qualifying purchases. For more information, see my disclosures page.)
As with any DIY project, please use your judgment and be very careful. Hot wax is dangerous. For more information, see my disclosures page.)
Why Would You Want to Make Your Own Candles?
The problem with conventional store-bought candles is that they use fragrance oils to scent the candles. Yes, they smell amazing but they are spewing hormone disrupters all through the house.
Many cheaper candles are also made with paraffin wax. I prefer to use more natural products like beeswax or soy wax. You can buy both beeswax candles and soy candles from Amazon, but for a Christmas gift, I prefer to make my own.
Candles are fairly easy to make and you can find all kinds of unique glass jars and candle containers to make them in.
One year I purchased three wine glasses of various shapes and heights (but still similar in style) and made a candle arrangement to give as a gift. It was a very elegant look and the wine glasses came from the Dollar Tree!
Mason jars also work really well and make a very stable candle that isn’t knocked over easily. This is especially important if you have pets or small children in the house.
What You Need to Make Homemade Candles
To make your candles, you will need:
- sturdy glass containers or old mason jars
- candle wicks, at least one inch taller than the candle container
- soy wax flakes or beeswax or a combination of the two
- a glass measuring cup to melt the wax in*
- a saucepan to set the glass measuring cup in
- essential oils (Plant Therapy brand is my favorite. They also offer free shipping on any size order.)**
- pencils or chopsticks or popsicle sticks
- something to stir the wax, like an old spoon
- candle colorant, optional
* I recommend using an old glass measuring cup or glass jar that you keep specifically for making candles. It can be difficult to get all the remaining candle residue out of the container.
**For Fall, I like to use my favorite combination of essential oils but for Christmas, this Holiday Season blend would be great. Or you can grab my free printable with over 30 essential oil combinations below and use any of them to make your candles smell nice.
If you don’t want to purchase the ingredients separately, you can purchase a candle-making kit on Amazon or at your local craft store that contains everything you need.
And while I don’t usually recommend fragrance oils, some companies have started making some more natural fragrances. Sometimes it can be difficult to get a good “scent throw” with pure essential oils, so these fragrances may be an option.
You can also find many more scents with fragrance oils since they are man-made. Whatever type of oil you choose for your scented candle, I just recommend you do your research first.
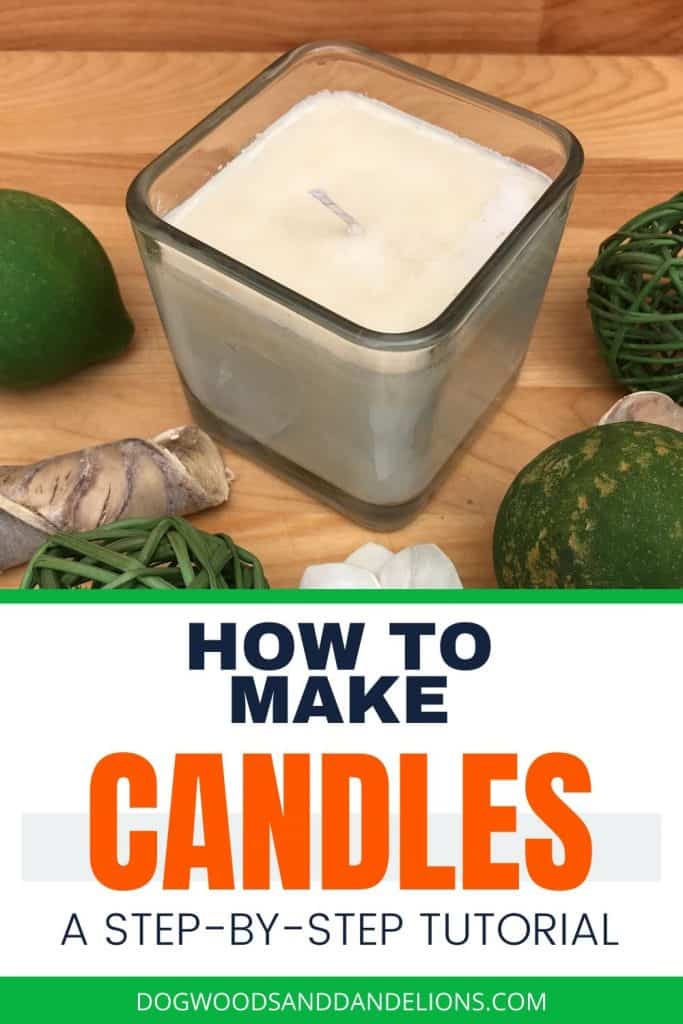
How to Make Homemade Candles

Melting the Wax
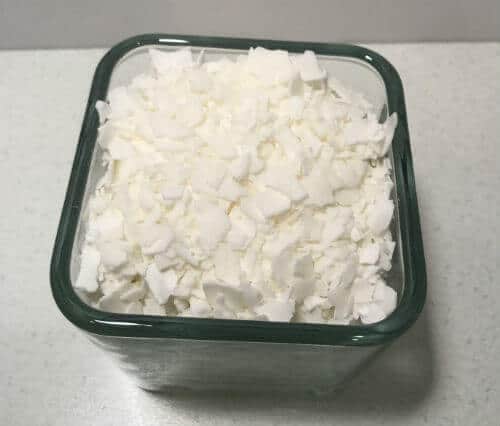
The first thing you need to do is measure your wax. You will need enough wax to fill the candle container twice.
I actually used the candle jar to measure the wax. Fill the candle jar, pour it into the pyrex measuring cup, and repeat once. Set the wax aside.
To the saucepan, add about 2″ water. Place on the stove over medium heat and place the Pyrex measuring cup in the water. (Alternatively, you can use a double boiler if you have one.) Slowly allow the wax to melt, stirring as needed.
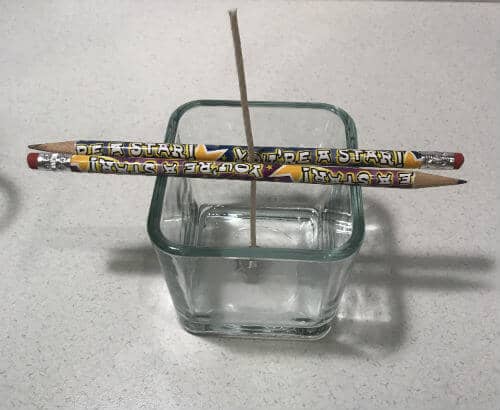
While the wax is melting, prepare your candle wick by straightening it, if necessary. Once the wax has started melting, carefully dip the bottom of the wick (the metal tab) into the melted wax.
Gently place the wick in the center of the glass container using a chopstick or popsicle stick to press it to the bottom of the jar. Allow the wax to cool. This will help keep the wick anchored to the container when you pour in the remaining wax.
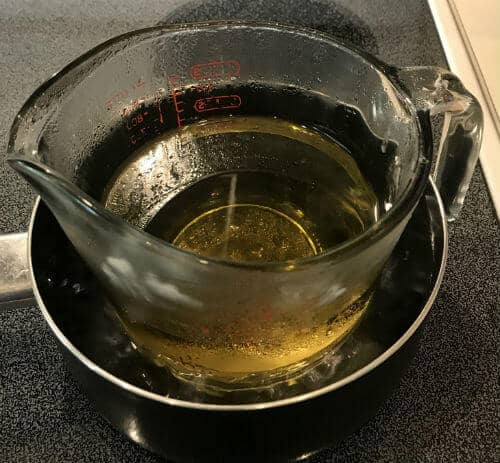
Continue to allow the wax to melt, stirring occasionally. Notice how full the pyrex container is in picture #2 versus picture #4. It melts down a lot.
If using a candle colorant, add it according to package directions when the wax is nearly all melted. I tend to leave mine uncolored so the candles always match my decor.
Once the wax is fully melted, remove the saucepan from the heat. Carefully remove the pyrex from the water and dry the bottom of the pyrex container.
Let the wax cool for several minutes. If you let it cool too long and the wax starts to harden, you can always re-melt it.
Then add the essential oils, using 10-20 mL per pound of wax. (For my two candles I used approximately 1 1/4 pounds of wax and 12 mL orange essential oil, 6 mL cinnamon essential oil, and 3 mL clove essential oil for a moderately scented fall candle.)
Stir gently to ensure the essential oils are dispersed throughout the wax.
Pouring Your Candle
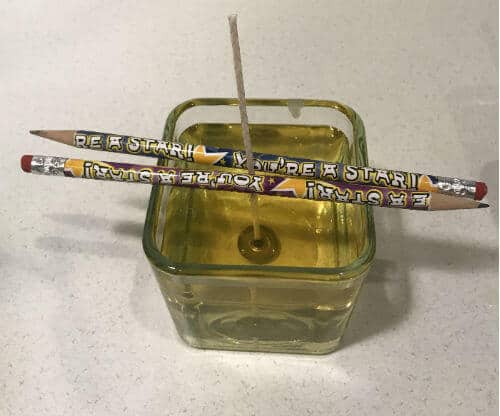
Slowly and carefully, pour the wax into your chosen container. Fill the container to nearly the top of the jar. Center the wick, using pencils or chopsticks to prop it up straight.
Allow the candle to harden on a flat surface, without disturbing, for several hours. Once the wax has hardened, trim the wick to 1/2″ above the wax.
Wait at least 24 hours to allow the wax to fully harden before lighting your candle. Your candle is now ready to enjoy.
To clean up from candle making, immediately after pouring the candles and before the wax cools, wipe up the warm wax with paper towels. Then wash your containers by hand or in the dishwasher if they are dishwasher safe.
Use your beautiful DIY candles yourself or make several to give as gifts. Container candles also make great housewarming gifts or end-of-year teacher gifts.
Other Do-It-Yourself Gift Ideas
Do you give homemade gifts for Christmas? What is your favorite thing to make and give?
- Homemade coffee exfoliating soap
- Easy DIY lotion bars
- Lip balm
- Stenciled flour sack towels
- Essential Oil Ornaments
- Find all my other DIY projects here.

Meet Julie
I’m a farm girl born and bred in North Carolina. I’ve been growing a vegetable garden for over 20 years (and helping my Mom grow hers even longer). I’ve been raising chickens in my bathtub and backyard for 12+ years. I believe that homegrown food can be made simple. Let’s get started.
This step-by-step guide will show you how to easily make candles at home.
- wicks, at least an inch taller than the candle container
- soy wax or beeswax that will fill the candle container twice
- essential oils, optional
- candle colorant, optional
-
First, measure your wax. You will need enough wax to fill the candle container twice. I actually used the candle jar to measure the wax. Fill the candle jar, pour it into the pyrex measuring cup and repeat once. Set aside.
-
To the saucepan, add about 2″ water. Place on the stove over medium heat and place the pyrex measuring cup in the water. Slowly allow the wax to melt, stirring as needed.
-
While the wax is melting, prepare your wick by straightening it, if necessary. Once the wax has started melting, carefully dip the metal part of the wick into the melted wax.
-
Gently place it in the center of the glass container using a chopstick or popsicle stick to press it in place. Let this cool. This will help keep the wick anchored to the container when you pour in the remaining wax.
-
Continue to allow the wax to melt, stirring occasionally. It will melt down considerably.
-
If using a candle colorant, add it according to package directions when the wax is nearly all melted.
-
Once the wax is fully melted, remove the saucepan from the heat. Carefully remove the pyrex from the water and dry the bottom of the pyrex container.
-
Let the wax cool for several minutes. If you let it cool too long and the wax starts to harden, you can always re-melt it.
-
Then add the essential oils, using 10-20 mL per pound of wax. Stir gently to ensure the essential oils are dispersed throughout the wax.
-
Slowly and carefully, pour the wax into your chosen container. Center the wick, using pencils or chopsticks to prop it up straight.
-
Allow the candle to harden, without disturbing, for several hours. Once the wax has hardened, trim the wick to 1/2″ above the wax. Wait at least 24 hours to allow the wax to fully harden before lighting your candle. Your candle is now ready to enjoy.
Hello there Julie! Thanks for posting this. I really love to give homemade gifts. I never knew how easy it is to make candles. Now I can make my own Christmas gift candles. Even my kids can help me doing this.
I hope you enjoy making them. Just be sure your kids are old enough to handle the hot wax. ? It gets really hot! (And I checked out your blog. It is gorgeous! I love the flowers and the happy colors.)
LOVE this idea! I typically make homemade Christmas gifts but haven’t been brave enough to try candles yet. This is now on my list for this year!
They really are super easy. I would love to know how they turn out!